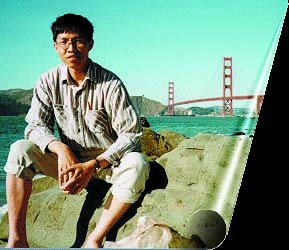

Charlih Chen

My Photo
Name:
Location: Cupertino, California, United States

I'm orignal from Taiwan.

Friday, July 31, 2026

Order my Tesla Model Y juniper standard RWD on 06/19/2026 or 07/18/2026

Picked it up at Tesla Los Gatos on 18JUL2026

Waste money on purchased the ceiling sunshade cover due to standard model did not have the glass ceiling though.

There is only single 12V cigarette jack at driver side back trunk.
1 USB-C within hand reset center control

2 USB-C at center control for back passenger where used to has touchscreen for back seats passengers.

So, standard version there is no touchscreen for back seat passengers.

No beam strip lights within interior.

2 mirrors has no electronic control, have to manually fold them.

The mobile connector charging kit is included and placed within back trunk.

128GB Tesla USB thumb drive is included and plugged within glove box.

No $250 refund once you canceled order!

Check your PG&E SAID number from Look up your SAID, you may need it to apply rebate within 180 days after you purchased EV or installed EV charger.

Take a picture of the serial number and installation location of your EV charger..

Take a picture of your car's temperately license plate number and the document that is attached to the windshield.


Tuesday, June 30, 2026

My car Toyota Prius accident happened 2 weeks from now

To raise awareness about the seriousness of car accidents, I'm currently considering writing a blog about this incident!

I still don't dare to drive up to Kiely Blvd. Some car accident syndromes!

On Tuesday, June 16, 2026, at around 6:25 PM, 2 cars collision occurred near Kiely Blvd. and El Sobrante St.

My car Toyota Prius was traveling south on Kiely Boulevard when a Toyota Camry with license plate number 5VMCO41, driven by Mr. L???? R???? Lopez, one of (qualitasins.com) insured individuals, struck my car's driver-side front wheel and door. His vehicle may have been traveling north on the left turn or from El Sobrante St. crossing Kiely Boulevard.

My automobile was driven by the incident to crash into a corner lot's front yard bush. Fortunately, the bush and the wood street sign stopped my car before it could crash into the house's wall.


Note:
   It is not sufficient to attach the insurance approval certificate to your car. Additionally, you require the paid renewal online packing slip, which is the car license plate approval paperwork.


Labels: , , , , ,

Wednesday, April 01, 2026

To fix MP4 won't play on Samsung TV

The following FFMPEG command must be used to convert the circled MP4 files into H.264 in order for them to play on Samsung TV:

ffmpeg -i "input.mp4" -vcodec libx264 "output.mp4"


Labels: , , ,

Tuesday, December 30, 2025

Unable to run DSM7.3 bootloader after upgraded from 7.2 to 7.3

手賤升級到DSM7.3,啟動不了了(更新後無法執行 DSM7.3)

重新編譯引導(loader)啟動後無法開啟 DSM7.2 IP:5000(IP 無法訪問,或者 https://finds.synology.com 也無法查找到設備)

Panic!!!

Solution:
Downgrade(降級) from DSM7.3 to DSM7.1(42962)
=====================================
The trade off is loosing the system setup, but data file are still kept.
Why?
Because that if you choose to keep system and file both option, it will prompt "Failed to install DSM, Available system space is insufficient". So, the only option is to select "to keep file only" option.

Q: Why DSM7.1 and not the DSM7.2?
A: 需要半白才能安裝?

On Proxmox IP:8006 portal:
====================
To VM Shell: >> hp103 >> >_Shell
qm importdisk 100 /var/lib/vz/template/iso/rr.img local-lvm
#Assume that the VM for the NAS/DSM is on ID:100
Run the VM ID#100
Open the VM console >> menu.sh

>> Advanced option >> a: Allow downgrade installation
>> Select model >> ...
>> Select version >> DSM7.1
>> Select recompile the loader
>> reboot

Source:
======
Download the latest loader image: https://github.com/RROrg/rr
Upload the rr.img to local-lvm >> run qm command to make it as SATA0 as 1st bootable drive.

Download pat: https://archive.synology.com/download/Os/DSM/7.1-42661-1-NanoPacked


Labels: , , , , , , , , , ,

Thursday, September 25, 2025

How to solve the 3x3 Rubik's Cube?

The accompanying screenshot, which shows the layer 2 and layer 3 solutions, does not include the first layer completion since it is assumed that you are aware of how to do it.

Notice:
The Chinese character "前" is equivalent to "Front" in English. It indicates that the cube on the "Front" side is facing you.


Labels: , , , , , ,

Friday, June 27, 2025

How to Create a MacOS Bootable USB

 Q: How to create a MacOS bootable USB in order to boot it up while press "Option" key on booting MacBook?

A:  Please use an MacOS MacBook to create it.
FYI. The TransMac software created on Windows OS won't work since it created as no bootable USB drive!!!

Here is the creation information:
=======================

Please download  MacOS_version.DMG file to a MacBook >> double click on the .DMG >> double click the Install MacOS.pkg >> It will install into Application folder >> using Terminal command with sudo to write the installer into USB drive.

(Some cases that there is no Install MacOS.pkg after double click on the MacOS_version.DMG, it will open with Installer MacOS.app, in such case, just drag & drop it into Application folder)

Here is the list of sudo command URL: https://support.apple.com/en-gb/101578

There is no list of command for Yosemite, here is the command:

sudo /Applications/Install\ OS\ X\ Yosemite.app/Contents/Resources/createinstallmedia --volume /Volumes/MyVolume --applicationpath /Applications/Install\ OS\ X\ Yosemite.app

Labels: , , , , ,

Thursday, November 28, 2024

The right procedure to upgrade bigger size hard disk for Synology on Proxmox PVE

 If you DO NOT deactivate the going to replace Hard Disk, the new Hard Disk will ALWAYS show "Critical" status!


To avoid the above symptom, you have to deactivate the drive first before you replace it.

Here are the step by step of how to upgrade bigger Hard Disk for NAS:

STEP1: Logon to NAS portal at http://NAS-IP:5000

STEP2: To deactivate the drive

   sub-step1: Go to Storage Manager > HDD/SSD

   sub-step2: Select the drive and click Action > Deactivate Drive

   sub-step3: Tick the checkbox to confirm that you want to proceed and click OK

   sub-step4: Enter your DSM password and click Submit

STEP3: Shutdown NAS

STEP4: Detach the sata1 from the Proxmox NAS visual machine hardware

STEP5: Power off Proxmox

STEP6: Replace the bigger sized Hard Disk

STEP7: Power On Proxmox PVE

STEP8: Run _shell on Proxmox

STEP9: List Hard Disk(s) command: 

   sub-step1: lsblk

   sub-step2: ls -l /dev/disk/by-id/

STEP10: Add the new Hard Disk to NAS command:

qm set 100 -sata1 /dev/disk/by-id/YOUR_HardDisk_ID

Eg. qm set 100 -sata1 /dev/disk/by-id/ata-ST4000NM000A-2HZ100_WS21S7BJ

STEP11: Go to Storage Manager > Storage and select the storage pool that has a Degraded status

SETP12: Click on the upper-right icon  and select Repair to repair the storage pool

Note: It will take 1 day or more hours to repair the degraded hard disk.